The Blister
Week 6 - The blister
The blister was our final task. I found this one the easiest probably due to my experience so far with metal shaping as well as the fact it was just hitting one area and there was no chance of creating folds which I found difficult in the previous tasks particularly the tray.
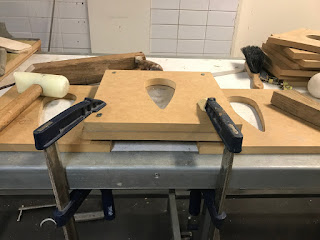
This task was enjoyable as it allowed us to make and use our own metal shaping tools using the ban saw and electric sanders. I bolted two pieces of wood around the metal to avoid wrinkles when shaping the metal however this meant the metal would be prone to splitting. I clamped wood and metal on top o two other pieces of wood leaving the gap for the blister open as I wasn't sure how far out the blister would come through the gap in the wood and I thought if I was hitter the blister onto the surface of the table the metal might harden quicker making the refining of the blister more difficult..
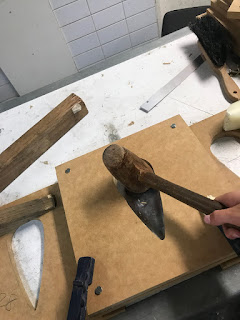
To avoid splitting my metal using this technique I made sure I was hitting it softly but for a longer amount of time. I used a few different hammers for different areas of the shape such as the wooden one and both shaped nylon hammers. I found the wooden hammer good to start off with as It was the softest/lightest I could create the blister dint whilst still being cautious of the metal splitting. I used two different corking tools one with a very sharp angled end for the end of the tear drop and another with a more rounded thicker angle for just outside the end of the tear drop as well as around the edges closest to the wood. I also trialled out a few corking tools that were laying around the workshop to determine if mine should be thicker, thinner more rounded or more angled. Once I had formed my blister I took the top piece of wood off and and softly hit the blister with the large end of the female hammer to create a smoother surface.
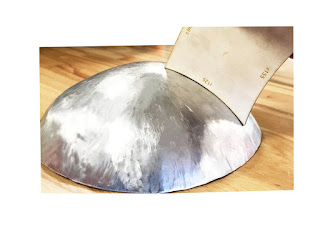
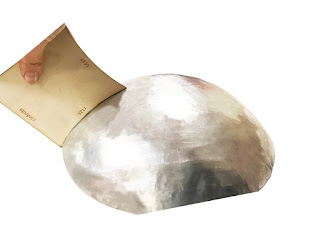
This exercise was beneficial as not only did you learn how to form a blister which is a mould like shape we also were encouraged to make our own corking tools to complete the task which is something you could do for any metal shaping exercises if your decided shaped tool is not available. The blister being a mould like object is definitely something I could carry through to my discipline whether used as a mould for a landscape model I wish to create out of a softer material as well as creating interesting shaped stencils to then transform metal shapes through the use of customised corking tools which could then be used for concrete casting for paving and sculptural features of shapes that may not be able to be achieved through other techniques of metal forming.
Overall I thoroughly enjoyed this task for its use of a cnc cut stencil which could be any any shape you wish and the ability of the metal form itself to be used to replicate the interesting shape you may have designed onto other materials.
 .
.  .
.


 .
. 
 .
. 


The blister was our final task. I found this one the easiest probably due to my experience so far with metal shaping as well as the fact it was just hitting one area and there was no chance of creating folds which I found difficult in the previous tasks particularly the tray.
This task was enjoyable as it allowed us to make and use our own metal shaping tools using the ban saw and electric sanders. I bolted two pieces of wood around the metal to avoid wrinkles when shaping the metal however this meant the metal would be prone to splitting. I clamped wood and metal on top o two other pieces of wood leaving the gap for the blister open as I wasn't sure how far out the blister would come through the gap in the wood and I thought if I was hitter the blister onto the surface of the table the metal might harden quicker making the refining of the blister more difficult..
To avoid splitting my metal using this technique I made sure I was hitting it softly but for a longer amount of time. I used a few different hammers for different areas of the shape such as the wooden one and both shaped nylon hammers. I found the wooden hammer good to start off with as It was the softest/lightest I could create the blister dint whilst still being cautious of the metal splitting. I used two different corking tools one with a very sharp angled end for the end of the tear drop and another with a more rounded thicker angle for just outside the end of the tear drop as well as around the edges closest to the wood. I also trialled out a few corking tools that were laying around the workshop to determine if mine should be thicker, thinner more rounded or more angled. Once I had formed my blister I took the top piece of wood off and and softly hit the blister with the large end of the female hammer to create a smoother surface.
This exercise was beneficial as not only did you learn how to form a blister which is a mould like shape we also were encouraged to make our own corking tools to complete the task which is something you could do for any metal shaping exercises if your decided shaped tool is not available. The blister being a mould like object is definitely something I could carry through to my discipline whether used as a mould for a landscape model I wish to create out of a softer material as well as creating interesting shaped stencils to then transform metal shapes through the use of customised corking tools which could then be used for concrete casting for paving and sculptural features of shapes that may not be able to be achieved through other techniques of metal forming.
Overall I thoroughly enjoyed this task for its use of a cnc cut stencil which could be any any shape you wish and the ability of the metal form itself to be used to replicate the interesting shape you may have designed onto other materials.
 .
.  .
. 

 .
. 
 .
. 


Comments
Post a Comment